
 Menu
MenuYou may remember Vinny The Pug from the Halloween costume we made for him earlier this year. It's the festive season now, so we have made him an adorable Santa outfit using Kwik Sew Pattern K4033, with some of our Crushed Velvet Fabric.
'Bah HumPUG'…
First measure your Pug! (other dogs are available)
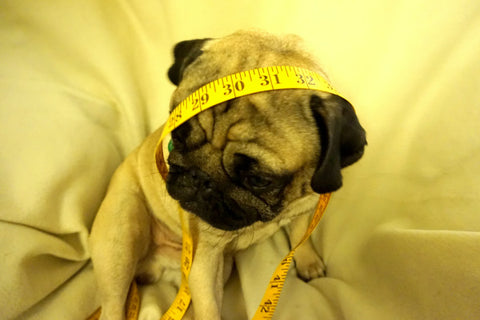
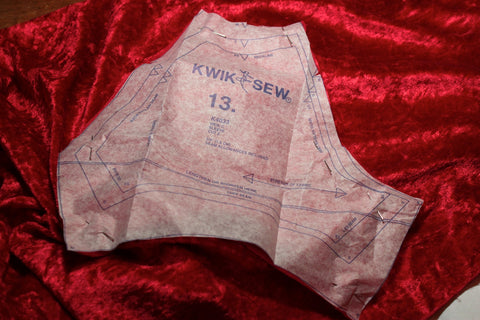
After measuring Vinny from the back of his neck to the base of his tale, we decided to opt for the middle size on the pattern. Kwik Sew patterns are very clear and easy to work with, so we found that cutting out the middle size markings on the pattern was a doddle.
The pattern recommends using a stretch jersey fabric, so we decided to use WeaverDee's Crushed Velvet as it has the right amount of stretch for a comfy fit.
We also considered using a red fleece, but this didn't look quite as festive.
White fur fabric was used to make the bobble and trimming for the hood, coat bottom and cuffs. The pattern suggests ribbing for the cuffs, but obviously that would not have the desired Christmas effect.
Having cut out the crushed velvet to the pattern pieces, we then cut lengths of fake fur to add the trimmings (approx 10cm wide)

The fur and crushed velvet were attached (wrong sides together) with Prym Wonder Tape prior to sewing.

The fur was then stitched to the crushed velvet.

Next, we applied a second strip of Wonder Tape and folded the fur inwards so that 5cm of fur would show to the outside of the garment. We then stitched the fur sewing as close as possible to the edge of the crushed velvet.

All of the main body pieces were then stitched together.


The hood was then attached to the main garment.

We then made the fur bobble by drawing and cutting out a circle of fur twice the diameter of the desired bobble size.

We stitched the bobble by double threading a hand sewing needle and tying a knot at the end of the thread.
Then we stitched all the way around the circle (about 1cm in from the edge) whilst gathering until reaching the starting point. A few securing stitches were then made, leaving enough surplus thread to hand sew the bobble onto the hood.
Next, we inserted the zip. Wonder Tape was used to baste the zip into position prior to stitching.

Finally, if you've been using pins: check very carefully that they've all been removed before inserting your Pug!
It's also worth mentioning that you may need to make allowances to accommodate the tail. We made a large buttonhole near to the bottom of the coat to allow Vinny's tail to pop through.


Sewing Tips
Velvet can be tricky to machine, so to avoid puckered seams, the use of a walking foot will be a big help in preventing the fabric layers from shifting.
Attaching fur to velvet can be an awkward process. We found that using wonder tape instead of pinning made it easier to position and keep the pieces in place when sewing. It was also a great aid for inserting the zip. When machining thick fabrics, use a slightly higher than normal stitch length (3 to 3.5mm) this will help the fabric feed through the machine more easily.
What we used:
-
1 Medium sized Pug
-
White Fake Fur Fabric
-
Universal Standard Point Machine Needle - size 90 / 14 packs of five
Crafting for Christmas?
Check out our Christmas Crafts section!